Like most actors, I shoot myself on tape with just a camera and backdrop. But a few years back, I struggled to record a quality video for an important acting audition. I didn’t want to mess it up, so I asked my friend to help me tape it. He was working as an assistant director for a tv show. So he had good technical knowledge.
I sent him a tape of what I had shot. To my surprise, he showed up with a lighting kit and set it up. We took a shot, and immediately I saw the difference. The scene looked more dynamic and cinematic. The lighting gave the mood required for the scene, and my expressions were visible in detail.
After that, I never shot an audition without proper lighting. And I suggest you also invest in lighting for self-tape auditions.
Here I am going to provide everything there is to know about lighting for self tape auditions, and I have listed some of the best lighting kits that you can buy for your home setup.
Types Of Lighting For Self Tape Auditions
Before you learn about how you can set up lights for your self-tape auditions, you must know about the different lights you need for self-tape auditions.
There are plenty of lights used in a professional setup, but we need only the following lights:
LED Lights
Led light panels are quite popular nowadays among filmmakers. They are easy to set up, easy to power, and portable.
These are nothing but simple LED lights on a panel.
You will find two types of led lights used for photoshoots and videography:
- RGB lights – RGB lights mean a combination of red, green, and blue. By combining these three lights, you can provide a different tone to the scene. You can produce more than 16 million colors with a combination of these three lights.
- Bi-color lights – With Bi-color lights, you can control the temperature. Basically, you can choose the color from yellow to blue. This light is great for showing a specific time of day in the scene. More yellow means it is morning or afternoon, and as you go more towards blue you can portray evening.
You can always use the combination of both lights for auditions.

Ring Light
When you send out acting auditions to casting directors, they want to see your face, eyes, and expressions clearly. So make sure there is no shadow on your face.
The only way to ensure that is to place the camera where can receive maximum light coming from your face which is exactly opposite to your face. It is only possible if the light source and camera are at the same spot.
This is what a ring light does.
It is nothing but a light in the shape of a ring. This design allows you to place a camera at the center of it.
When you use a ring light, the light is evenly distributed around the object eliminating shadows and highlighting details.
If you see some shadows on your face, always use a ring light for the self-tape. However, it is not designed to light up the whole frame. You will have to use LED light or softboxes for lighting the rest of the frame.
Box Lights
We use box lights when we want to provide controlled light to the frame. It is also known as a softbox. It has two components light source and diffusion.
It depends on the type of light you want for the shot. The light source is either LED or fluorescent light. However, when you provide the light without the diffusion it is hard.
Hard light can cause reflections and glare. So need diffusion to soften it.
The diffusion is either made of a thin paper sheet, thin cloth, or plastic. And the color is generally white, but sometimes a colored diffusion is used to provide a certain tone to the scene.
For self-tapes, you will mostly use white diffusion with LED light or fluorescent bulbs. You don’t have to worry about the colored diffusion.
Lighting Setups
Now you have a good idea of which lights to use. We can now move to different types of setup that you can use to light your self tape.
Natural Light
This is one of the basic type of lighting. We use one key light. The key light is nothing but a light that is brighter and directed towards your face.
With this setup, a bright light source is set right behind the camera, and that is it.
This is the setup we generally do if you don’t have any resources.
You can either stand in front of a window or use the brightest light in the home to light the self-tape.
It has a lot of disadvantages. You will struggle with a lot of shadows and you won’t be able to provide a proper mood to the scene. Because the light is specific and you will get the proper light only during certain hours of the day.
Here is the setup to follow:
- Use the largest window in the house and remove all the blinds.
- Stand at least 2-3 feet away from the window.
- Also, leave enough room between the back wall and you so that there is no shadow on the wall.
- Keep the camera at eye level.
Natural Side Light
Sometimes you might have a window, but you won’t have a wall exactly opposite to it.
In such cases, the light will be hitting one side of your face creating a shadow on the other side.
To counter the shadow on the other side of your face, you will have to use another light source like a table lamp.
Here is the set to follow in such a situation:
- Choose the largest window in the house.
- Open it and remove all the blinds.
- Again stand away from the back wall so that no shadow is visible on the wall.
- And from the other side, use a table lamp at eye level. It should not be as bright as a window.
- Keep the camera at eye level.
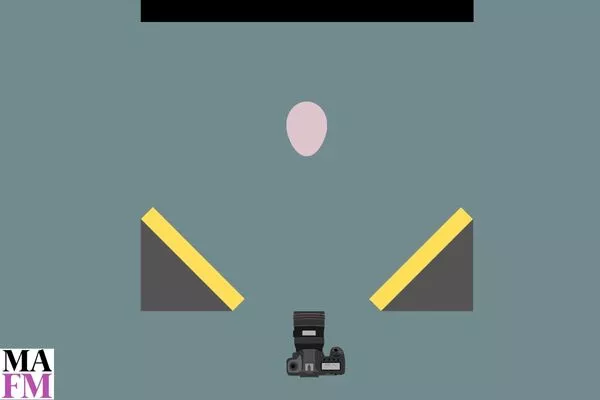
2 Light Set-Up
In both the above cases we depend on the sun’s natural light. With such a setup, you can only shoot during a certain time of the day.
How do you shoot a scene that is set in the day during the night?
If not complete setup, get at least two lights with a softbox and tripod. Choose the plain backdrop or get a backdrop for your self-tape.
Here is the setup to follow:
- Set the light on either side of the camera at 45 degrees. The softboxes should be at head level.
- Use a softbox to control the light and set the right temperature for the scene. Go with the bi-color lights to get the right temperature.
- Even with these two lights, there will be shadows on the back wall, so will leave some space.
3 Light Set-Up
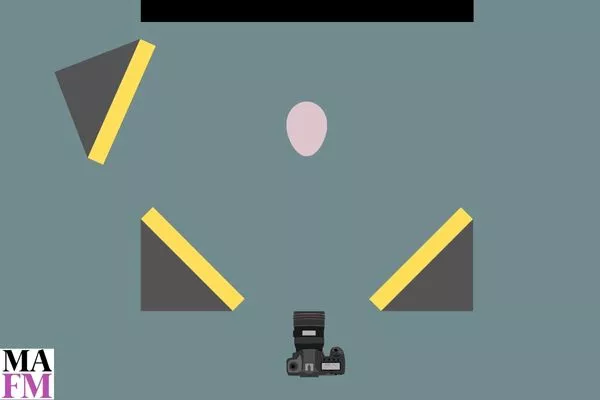
The last setup is basic and won’t give you the dynamic lighting you need. You will have to add a third light to the two-light setup.
This light is called a hair light, and it is behind the actor. It is a great way to separate the subject from the back wall. The illusion of real space is created with this setup.
Follow this direction for the setup:
- Follow the instructions provided in the two light set up.
- Keep the hair light behind you.
- It should be angeled at the back of your head and top of your shoulder.
- Keep the light intensity low. It should not be as bright as the other two lights.
- Also, keep the light away, so it is not visible in the shot.
Add a Backlight
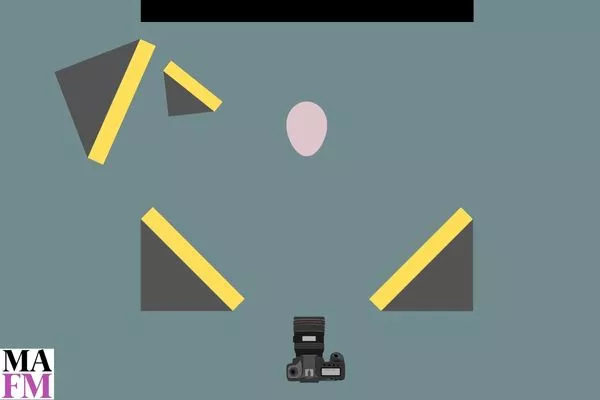
You can make the scene dynamic, but still, the depth is missing.
If you just observe the lighting around you, you will see there is some kind of lighting reflected on the background wall. This gives you a sense of depth.
Also, whatever shadows you are getting with three light sets up can be wiped out with the help of a backlight.
To achieve this in your self-tape, you will need to use a small light hitting the backdrop directly.
Follow the instructions to add the backlight:
- Just follow the instructions from the above set ups.
- To add the backlight, use a low-intensity light or a table lamp.
- Keep it low on the ground and angled up to the backdrop.
- Adjust the intensity according to the scene.
Add a Ring light

If your face needs more light, add a ring light to the setup. Doing so will remove any shadows caused by other lights and make your eyes sparkle.
Here is how you can add light to your setup:
- Follow the instructions mentioned above.
- The ring light should be facing your face, and the camera should be at the center of the ring light.
- The camera’s height should be the same as the other cameras and your head (except for the light for the backdrop).
Our Recommendation: Lights That You Must Buy
1. Fovitec Complete Studio Lighting Kit

I suggest you get a 3-point lighting kit if possible. This will give you the best possible lighting combination for your self-tapes.
Fovitec kit is one of the best 3-point lighting kits you can buy. It has three lights with a tripod, bulbs, softboxes with diffuser, backdrops, and backdrop stands.
The light uses fluorescent lights, using which you can provide a temperature of 5500 kelvin. The bulbs are 45-watt bulbs which are appropriate for studio lighting.
In addition to that, you also get three softboxes with diffusers to make the light softer.
The kit has three types of backdrops, black, green, and white. All three are made out of muslin which is a wrinkle-free material.
Even the backdrop size is 10×20 feet which is perfect for taping a self-tape at home. You can easily accommodate two actors in the scene with the backdrop.
2. GVM 3 Pack LED Video Lighting Kits with APP Control

With Fovitec you get the basic lighting without the dimmer switch. If you want to get the precise lighting for your scene, then you need something that can be controlled and gives the right color for the video.
I advise you to get the GVM 3-point lighting set up. It is not a complete self tape kit. You only get the lights.
However, the lights are bi-color lights that can be controlled. You can control the temperature from the range 2300K to 6800K, and also brightness can be controlled from 10-100 percent.
And the great thing is you can control the brightness using an app. You can also set the brightness and temperature from the back of the light.
3. Neewer Ring Light Kit

As we said earlier, adding a ring light to your setup will help you provide dedicated light for your face. You must have it for your self tape kit.
I recommend using the Neewer Ring Light kit because it has two filters and supports both phone and DSLR cameras.
Also, the LED lights are dimmable from 10-100 percent, which allows you to match your lighting with your key light.
You also get a remote to control that light, which allows you to adjust the light quickly between the takes.
Also Read:
Final Thought
I have tried to share everything about the lighting for self tape auditions. Make sure you make the habit of setting the lights before you start shooting acting auditions at your home.